Thursday, December 29, 2011

Banner - Pencils to Inks

I decided that I need a new banner for my blog. I really like the stars and the moon, but I think it's a little dated at this point, and I want to have something for the New Year!


Clean workspace please!

So for starters, I clean my desk and get my pencilling tools ready. I usually do prelim sketches on copy paper.


I usually end up using 3 different erasers when I pencil. This is probably a little overkill, but I end up using each to erase different lines. The automatic eraser is the newest addition, and is great for removing pencil that I may have worked up too far and realized I need to get rid of. The other two are for lighter erasing.


Now I have a sketch on the copy paper. This is loose and spontaneous, but it needs to be defined enough to transfer to the actual art board.


Taped to Bristol

I've got the copy paper taped to the artboard, made sure the angles are correct, and then get out my lightbox.
Transferred to the artboard.
 At this point I have now transferred the sketch to the bristol board that I'm going to have the finished art on. This piece is 9x12. I want to keep some of the spontaneity of the original sketch, but I define the lines better.
Detail on the pilot.
Detail on the mecha.
Ready to ink.
I work up the detail on the pilot and then move to the mecha. I am told by my fiancee the mecha sketch looks like a fairy. You can see that I make a notation of the ellipse that I'll need for inking near the shape on the pencils.


Here are inking tools that I use, and that I'll need for this piece. French curve, Triangle, Glass ashtray for ink, Notched ash tray to hold brushes, Black ink for drawing and white ink for touch ups. Micron technical pens .005 .01 .05; Faber Castell M Artist Pen. Raphael #1 for line work, #2 for touchup, #2 for dry brushing and spotting blacks, and a G-Nib dip pen.

Once everything is set up and cleaned, I'm ready to go! Inking Ho!
Faces first!

After faces, foreground

Some texture and detail, then move to the design.

Start inking the mecha


Linework on mecha.

Line work done.
At this point the linework is pretty much finished, and it's time to spot blacks. I used primarily brush for the pilot in the foreground, and the G-nib for the mecha, however the tight ruled lines were done with the technical pen. It is now time for black!

Covered up with Post-it notes.

Black texture for the design.

More black

Final Blacks and Textures.
I use post it notes to cover up the parts of the board I don't want to ink. This allows me to continue the stroke through without holding off at the end. I'm overall pleased with the result, but I've made a few mistakes that I need to fix.

All done!
After touching up with the white ink, and adding some texture, I decide that the chest of the pilot jacket looks a little too empty, so I add on the patch.  I sign the piece and I'm all done!

A Note on Process

I was talking with a friend recently about my blog and thinking about sort of focusing it down a bit, to help you my readers have a reason to come visit here over top of my deviantart or another online site such as that.

One thing that I though would be fun is to regularly show work process and step by step descriptions following my thought processes and decision making for a particular piece of work.

Lots of people make sketchblogs, and regularly update with fun sketches and drawings they have done, but I find it much rarer for an artist to show the entire process, from crappy sketch to finished work. Process is also something that I think many artists struggle with, especially artists who work in a commercial artform like Comics or Illustration, or Graphic Design. The sketch and planning is very essential to consistently making successful commercial art, and while I wouldn't say my planning phase is necessarily prefect, I think I have a pretty solid way of working.

Due to this, I think I am going to show my work process, from start to finish, as well as talking about tools that I use and why. I'm sure my process will continue to be refined, and steps added or removed, but this evolution is key to any comic artist.

So without further ado, lets get into it!

Monday, December 19, 2011

Some Head sketches

 I've been plugging away at Madness of Phantom Hitler, but I have done some other drawings on the side.

Here are a few head sketches I did the other day, one from Phantom Hitler, and one of my own character.


John Dillinger

Topgun


Enjoy!

Monday, December 12, 2011

Frame in Frame

A few sketches I did around the house.


Enjoy! I'm thinking about making some ink drawings outta these, whatcha think?

Wednesday, November 30, 2011

Thursday, November 24, 2011

Happy Thanksgiving!

Hope everyone who celebrated today had a great one! I spent most of the day enjoying Skyrim, and relaxing.

I've finally gotten started on the excited, fantastic, and super cool Madness of Phantom Hitler comic with Carlos Florez and Wesley Dodge Smith. Pretty great stuff!

Fun Fact: Cats are the 7th sleepiest animal on the planet, and the most popular housepet!


Here's a sketch of my house that I did over a few weeks ago. Enjoy!

Saturday, November 19, 2011

Finals are over, Skyrim comes, and some awesome art!

So finals are over! This past week as been totally crazy, and I haven't updated my blog for a bit because of it, but no fear! I will show you lots of awesome art today!

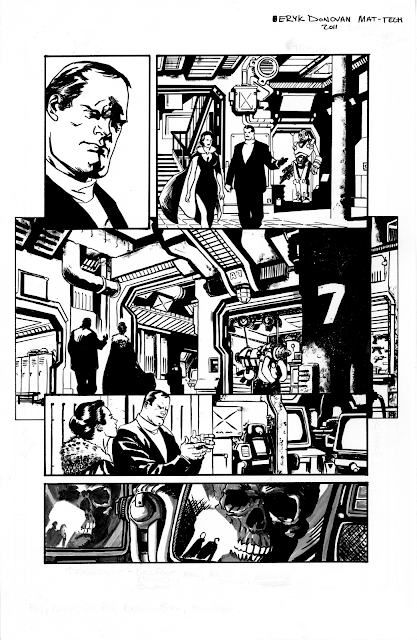
First up, here are some of my favorite pages I did all quarter, and a sneak peek into a project that I've been writing for awhile! These pages are for a story called SCRAWL, about a struggling writer in near future world. I wanted to have a few sequential pages so that I could at least visualize the world and storytelling, so I created these for the final project in Environments, Props, and Structures.


SCRAWL


SCRAWL


SCRAWL

Awesome right!? These are just the pencilled versions, I plan on inking them over the break!

For my Environments, Props, and Structures class, I did two pages from different scripts, experimenting with different inking and watercolor techniques! I enjoyed these pages as well, and I'm pleased with them.


I.C. Hot, Stunter


Meet Cute

I hope you enjoy! I had a great quarter, but I'm definitely looking forward to the time off, as I'm starting brand new comic project today!

First things first though, it's time for breakfast and some dragon slaying!

Tuesday, November 1, 2011

The Snowtown Murder


I learned a little bit about the Snowtown Murders the other day, after I had done this illustration, but I felt that the title was still apt. I was also inspired of Warren Ellis' and Ben Templesmith's  excellent Fell comic. Oddly for the detective version, most people made it snowing, in fact it was snowing in most of the projects from my class. Must be the change in temperature around here.  I love noir, and I love using black, so choosing this subject matter for my drawing was natural for me, and I felt that the snow would accentuate the scene.  I've been enjoying the Materials and Techniques class, and I think I'm getting better as we go!

So anyway, enjoy! This is the scan of the entire board. For the project it is cropped, but I felt this illustration would benefit from the entire picture plane. You can see the "finished"version over at my deviantart.

Wednesday, October 26, 2011

My attempt at Paul Pope and some Tomb Raider

New art!? Oh yeah!

Eryk Donovan as Paul Pope? Nah!

This one is for my Materials and Techniques class. We were given a pencilled page which we then needed to ink in the style of a famous or established artist. I chose Paul Pope because I love the vibrancy of his line weight, and loose style. This project really gives me an appreciation for the work that he puts into his pages and the expertise he has as an artist.


This page is from my Environments, Props and Structures class. In class we made a loose action script, and each person in class drew a page number out of a hat. I got page 10, where Lara Croft swings into action to defeat the villian. I had fun with this page, and while we were not required to ink it, I think its always good to practice!

This past weekend was a little rough, I was tired and sick, and unfortunately didn't spend as much time as I needed to working, but I feel better now, so I should be able to get everything done before its due.

Monday, October 17, 2011

Walking Dead, Mystery Box, and a Gun Show

So I loved last night's season two premiere of The Walking Dead. Being a fan of the comics, I am glad to see Kirkman's masterpiece brought to the screen, but I am also enjoying the differences between the books and the show.

During our props class today, we had to draw a girl with a gun based on photo reference, and after drawing the girl I was to inspired not to leave it blank, and I added some (not so perfect in perspective) zombies in honor of the Walking Dead.


The Dead ARISE!!!!


We also had to draw a Mysterious Box, purchased by my professor at a yardsale over the weekend. The box is a genuine artifact, a tool used in the early 20th century which measured electrical currents.

The Box
We determined the box would be a great McGuffin for some sort of story, it positively reeks of mystery and intrigue, which is typical of even the most mundane old artifacts.


Finally, we had to draw ten different guns for our homework project. I really enjoyed this and since I'm going to be working on a story set in the 50s over the next few months, I thought it would be a good idea to learn up on some World War Two period weaponry. It's interesting how little our firearms have truly changed over the past 80 years, beyond the materials and the cosmetic differences.

M1 Bazooka and the German Luger 
Thompson M1 and Ithaca M37

 
Johnson M1941 and MG42


MP44 and S&W .357


Colt M1911 and G43


Enjoy!

Friday, October 7, 2011

Some Inks and a Lifedrawing sketch

What have I been up to you ask~? Well I'll show you!

High Roads

 My first inks of professional pencils. This is the cover of High Roads #3, art by Leinil Yu. Overall I am pretty pleased with how this turned out. I used a brush for this one.

Yanick Paquette


This is some artwork from Yanick Paquette, a page from a book called Terra Obscura. The objective here was to use different tools to ink different panels.

From top left - G-Nib, Tech Pen, Brush, Brush, Marker/Nail/Knife.

I am pretty happy with this one as well, we will be doing a toning assignment on these inks as well.

I am also working on a cartoon style comic that I think I'll be hosting here online. Look forward to that over the next week.

Lastly a little life drawing from the open model session this afternoon.